Thursday 30 August 2012

Felt Strawberry

Not using patterns to make my felt food means I am using the real thing to help work out how to make each item.  Studying strawberries (in between munching on them) I figured using a kind of similar technique to making a Suffolk Puff would work- and it turns out that I was right.


Tutorial
Makes one strawberry (although given there are a number of steps it is much easier to make more than one at a time).  Finished size - approx 4cm high & 4cm wide at the widest point.

Materials - red felt (10cm square), green felt, embroidery thread, thread, needle, sewing machine (optional), stuffing. A glass or small bowl with approx 9-10cm diameter works well to help draw the strawberry part-circle pattern.
Basic pattern shapes
Strawberry top or 'calyx' (the green bit!)- Using a sewing machine free motion embroider a rough 5-point star shape outline (about 1cm - 2cm across) onto green felt & then another larger star outline outside the first.  Finally cut the star shape out with rounded 'points' to end up with a star shape approximately 4cm-5cm across. If using a sewing machine it is easier to sew first & then cut.  Alternatively you could cut out the shape & then hand stitch the detail on later.
6 sewn calyx/tops with one cut out ready to go

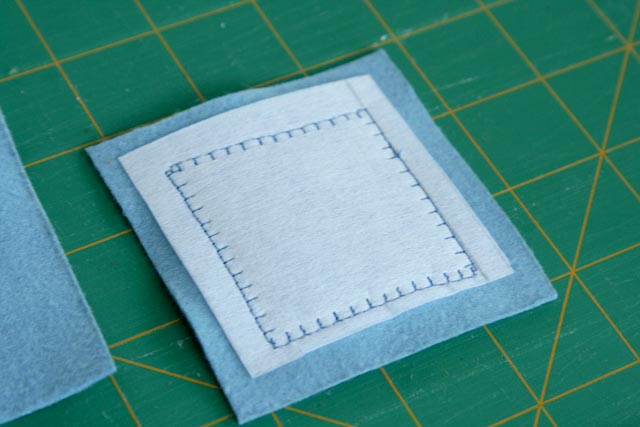
Strawberry 'body' - From red felt cut one part-circle (roughly a semi-circle with about an extra 1/8th of a circle).  Use 3 strands of pinky/brown embroidery thread (or a mix of these types of colours) to hand stitch seeds all over the red flesh of the strawberry.

Then fold right sides together and align straight edges. Machine stitch seam along straight edge. Clip excess felt away at the point if needed then turn right side out and make sure the point is poked out properly to give a nice shaped strawberry.  Next, hand stitch a running stitch (using a double thread for extra strength) all the way around the top curved edge leaving a long tail of thread.


Then pull up the gathering thread carefully to begin to close the top of the strawberry.  Before the opening gets too small though, stuff the hole with polyfill to fill the strawberry.  A tip here is to first secure the end of the thread before you start the running stitch & then pull & gather up the felt to close the opening - far less fiddly than having 2 free ends of thread to pull up to gather while also trying to fit stuffing into a small space.  Once stuffed, pull the gathering threads to mostly close off the hole & tie off.   Reinforce gather with another round of stitching.

Finally, sew on the green calyx / top & you have one completed strawberry.

Just a few more to make a punnet!

Other felt food:
Link to my felt apple entry

Saturday 25 August 2012

Felt Apple


Tutorial

Instructions for one green apple - but you could choose any 'apple-y' colour of your choice.
Materials - Green felt (about 15cm square), brown felt scraps, needle, thread, stuffing, sewing machine (optional)


Apple stem and 'calyx'
From brown felt cut a 1cm x 1cm square & then snip away at this to get a rough 6-point star shape - this will become the little brown bit you find on the base of an apple (the Nature Ranger in me recalls this as the calyx- the green bits that originally covered the flower blossom!)...but I digress...

From brown felt cut a rough 5cm x 2cm rectangle for the stem.

To make the stem roll the rectangle up lengthwise & stitch & wrap matching thread around & around to form the stem & hold it in shape.


Apple 'body' - From green felt cut 3 pieces of the basic template shape.  I'm thinking this  basic 3-piece ball pattern is going to work with minor adaptions for a number of fruit & veg.

From green felt cut 3 pieces of the basic template shape. 


Stitch 2 of these pieces together down one side from one point to the other.


Add the 3rd piece and stitch in place down one side.  Then stitch the final seam  to create a 3-piece 'ball' remembering to leave a 2-3cm opening at one point (where all the seams meet) for stuffing. 
The end with the hole will become the top of the apple.

Turn apple right side out and fill with stuffing.  Poke a finger down into the hole to create a bit of a gap in the stuffing to poke the stem into. Hand stitch hole closed and also stitch through the stem a few times to secure it in place. 

For this next step, use the longest needle you have as you need to stitch from the top of the apple all the way through to the bottom.  If your needle isn't long enough then squish the apple down to get the needle through.  Firstly position the small brown 'calyx' on the base of the apple and secure in place with a few small stitches.  Then finally give the ball a bit more of an 'apple' shape by bringing the top and the bottom points in towards each other.  Do this by running the thread from the base of the apple up to the top (near the stem) & back down a few times, pulling the thread tight enough to create slight indents at the top and bottom of the apple.  Tie off & you are done.

I might add a leaf to the next apple me thinks.


Thursday 23 August 2012

Felt Food

I've set myself a challenge, a 'felt food' challenge.  I didn't think it would happen quite this way, but this particular project has me hooked!

The project wasn't even on the official written 'projects to-do' list I wrote up the other day, but it has been brewing in my mind for a while and since I started the other night I have been a little obsessed!  (Sorry mum, your chair re-covering is on the back burner I'm afraid, this is much more enjoyable!)

Felt Food.

Little Imp loves playing 'kitchen'.  Making sandwiches, cups of coffee and lemon tea, stirring and cooking.  She also loves helping daddy in his vege garden.  She refuses to eat many a vegetable, but she can annoyingly name many of them while they are still in the ground!  I've seen plastic food sets in the shops & I know she would love to add this sort of thing to her pretend play games, but they are all pretty sad looking...and plastic-y.

So, my first plan is to make Little Imp a box of felt food for Christmas.  My second plan is to challenge myself and not look up any patterns for how to make things.  Of course I have seen images of felt food & looked at the ikea sets of fruits & veg in the past.  But no Google-ing allowed.  Time to work the brain. For one who is highly perceptually challenged this may well prove difficult & end in a great deal of cursing,
unpicking and/or what I will call 'newly discovered' species of strange looking fruit.  But so far, so good.


I've made an apple (that does look a bit blue in this picture, but is really green, promise), some carrots & a few strawberries & have a cucumber and lemon in progress.  Little Imp came across one of the carrots I had not hidden too well the other morning & loved it, so figure that is a good sign to keep going!

General Tips I've worked out so far:
  • Where possible I'm using a sewing machine to stitch, either free motion or straight stitching (much speedier & still giving me the finish I'm after).
  • My straight stitch machine seams are sewn with about a 1/8 – 1/16th inch allowance. 
  • If making multiple pieces of the same type of ‘food’ try to do them in batches to save time with frequent thread / bobbin changes etc.
  • I’m reminding myself that real fruit & veg are not ‘perfect’, so seams do not have to be straight & stitches can be wonky and that is fine!
More details for each fruit/veg to follow.

Tuesday 21 August 2012

A pretty party dress.

A family friend gave Little Imp a very white dress and cardigan set a while back that looks home crafted and very pretty in its own way, but not really something she might wear before she grows too big to wear it at all.

We have a wedding in the family coming up in the next few months & Little Imp needs a party frock.

The cardigan to start with
Hating to see a gift never worn, but also not too happy with the outfit as it looked to start - too white, too boring  - I decided to give it a makeover.

The finished dress

Some gold ribbons and bows were sewn into the woolen dress & the skinny white bodice ribbon replaced with a thick gold satin ribbon to be tied in a large bow at the back.


Of course I've also made a matching pretty gold satin hair clip for Little Imp (in an attempt to somehow tame her wayward hair, where on earth did the double-crown genes come from!?!)

Sunday 19 August 2012

Freeform machine embroidery


My first attempt at freeform machine embroidery.  

I think I might get hooked!

I chatted with a lady at a recent craft show I went to about this technique & returned with some hints & tips on what to do.  Turns out water soluble stabiliser was the ingredient I had never come across before that can make this all possible.
So, got myself some of the soluble stabiliser last week & had a go.

Essentially with this technique you sandwich fibres (wool/threads etc) in between 2 layers of water soluble stabiliser (which looks like a transparent plasticy type sheet) & then use a sewing machine to freeform stitch all over to hold all the fibres together.  Then you dissolve the stabiliser in water to be left with the finished product.  If you have free form sewn enough then it should all be held together as a new piece of 'fabric'.  If not it will all just fall apart!

Here are my scribbles on the steps I took making the small piece pictured.  All a learning process, so next time I will try a few different ways of doing things...

Place machine embroidery hoop over the top of a single layer of water soluble stabiliser.  Work out & mark with pencil the outline of the area you want to cover.  Then begin filling this in with a fine layer of wool fibres & then begin to add other layers of fibres for texture & colour.  I added cut & unwound different shades of craft wools first:

Then metallic gold & red fibres pulled out of a scrap of fabric (these threads were all probably a bit short to be held really firmly, but given the finished design was to be framed I wasn't too cautious).  Then some longer cut metallic thread & some 'bobbly' wool bits from a ball of novelty type wool.  Finally I added another really fine layer of wool fibres over some of the design to help hold things in place.

These pics show the pre-stitched fibres with a card frame I used to check what it might look like finished
Then carefully lay a second layer of the stabiliser over the top to form the 'sandwich' and secure it all in the embroidery frame.  Now set up to freeform embroidery stitch.  
Things I discovered during the stitching process:  
* Standard cotton thread seemed to snag quite a bit, the proper embroidery thread I bought worked much better, even when I had a standard cotton thread still in the bobbin,  
* A new fine (70/10) needle also helped
* A combination of varigated (multicoloured) thread & single colour threads worked well for me for this design
* I went round the edge to catch all the freeform stitched lines creating a border (but made sure this would be hidden under the card frame as I didn't want this to be seen).  Not sure that this was necessary, but figured it must help to hold everything together.
Front side of the finished stitched stabiliser-fibre-stabiliser sandwich
Finished 'sandwich' held up to the light - gives an idea of how fine the layer of fibres is - still see through

Remove 'sandwich' from the frame, cut away excess stabiliser & place into water to dissolve the stabiliser.  Here's hoping there is enough stitching to hold it all together!  Then allow to dry & frame.

Some close up detail shots of the finished product.


Wednesday 15 August 2012

Hand stitched farm scene discovery

Mum & dad have recently moved house & in the packing & unpacking a little hand stitched scene I made about 15 years ago was found.  I only have very vague memories of doing it, but it was around the same time I made the hot air balloons scene that has ended up on Little Imp's feature wall.


The calico background was painted with mum's water colours before the scene took shape over the top.


 I stitched over some real paperbark to create texture in the tree trunk and a mix of french knots, chain stitch and straight stitch to create the flowerbed, garden and orchard.


The main part of the house was another layer of calico stitched in place over the background.


Seems I was into texture and stitch even back then...


Saturday 11 August 2012

Felt Memory Game

A Felt Memory Game...or 'The Game of Same'.

I've seemingly only been watching the Olympics over the past while given the lack of updates, but I have been busy crafting behind the scenes, promise!

A long time ago, shortly after making Little Imp's eye spy quilt, I came across this beautiful felt memory game on the Purl Bee blog.  My idea was that one day I would make a similar felt game but one that could also be used for matching to pictures on her eye spy quilt. Then, about a month ago now, Little Imp suddenly started matching similar things and saying 'Same'.  It seemed that the time had come to do something about making my version - 'The Game of Same'.  Perhaps not quite as pretty as the Purl Bee version, but also much simpler & faster to do.  After all the cutting out, the sewing up was surprisingly fast.


Matching same-same cards to onto the quilt


 Basic How To
Materials needed (enough to make 20 pairs):
  • Felt (I found some felt much stiffer than others, the stiffer felt works better for this project)
  • Medium interfacing
  • Assorted print fabrics - for this project I used left over eye spy quilt scraps
  • Clear home made templates (helpful but not essential)
  • Cutting mat, ruler & rotary cutter


  • Measure & mark 40x  3 inch squares onto the felt & then cut out into pairs using scissors. Given my cutting & measuring skills are not perfect, I found keeping the pairs together to start meant they were matched better when I came to cut & stitch. 
  • Measure & mark 40x  2.5 inch squares onto the interfacing & cut out using scissors into individual squares.
  • Cut assorted print fabrics into 40x  2 inch squares, 2 of each fabric.  This is where a home made 2x2 inch clear plastic templates can be useful. Use them to work out which part or the best part of the design/print you will fit into a 2inch square before cutting.  Although each pair is from the same fabric, for this game I wasn't fussed the picture on each one wasn't exactly the same.  Nothing wrong with a bit of a Game of Same-Same challenge!
  • To make each single memory 'card' do the following:  Cut a felt pair of squares in half.  Centre a fabric print square on top of one felt square and centre an interfacing square underneath the felt.  

  • Machine stitch around the edge of the print fabric using a blanket stitch, catching the interfacing as you do so.  I didn't bother using pins, as long as the fabric print is centered, the interfacing doesn't have to be perfectly aligned.  Trim any interfacing closer than 1/4 inch from edge of felt.

  •  Place the other square of felt onto the back to cover over the interfacing and align & pin together. 

  • Machine stitch using straight stitch around the outside of the memory card. Trim if needed to neaten.
back & front of cards
  • Then make another card to get your first pair.  Repeat as many times as you like!
  • I also made a matching felt bag (of course!) to store The Game of Same.  Little Imp does like her game & for her age the game of matching cards to her quilt is just perfect!